Ipad Air 2 Repair.

Welcome to our Community
Wanting to join the rest of our members? Feel free to sign up today.
Sign up
glenwilson

glenwilson

NRU Heed
NRU Member
15 Mar 2012
9,970
12,994
228
65
Falkirk, United Kingdom
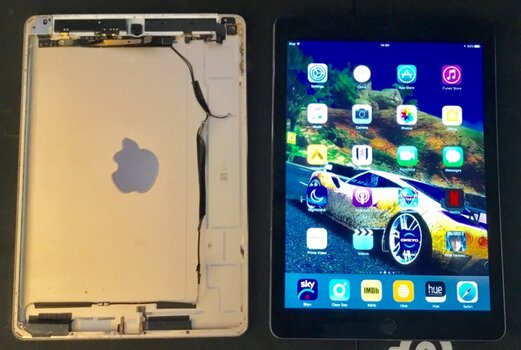
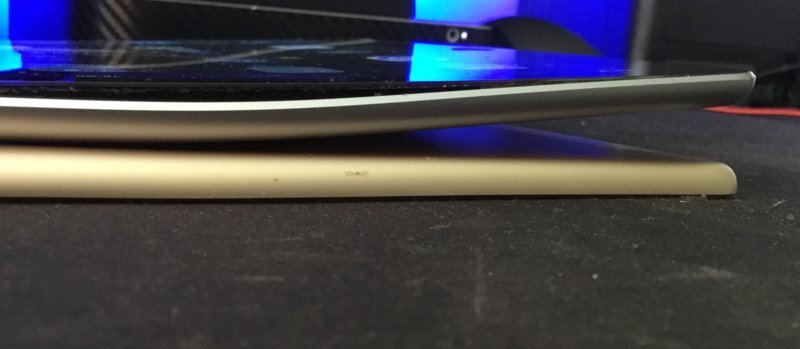
Had an iPad Air 2 for over 3 years now and took it on holiday to the USA. Whilst there the body of it became bent (as you can see in the photos). Really don't have any idea as to how it happened as I'm careful when something costs a decent amount of £s. Took it to Apple but it would have cost (and still does) £296 for a repair - basically a replacement. They tested it and said everything was working OK and suggested carry on using it which I did. Recently though the screen has started to detach from the body and the innards are becoming visible.

So having watched quite a few how to videos it should be possible to transfer the screen and guts to a back sourced off eBay for £29. Also needed to get an adhesive kit (£6) for holding the screen on plus some repair tape (£2) to hold some of the other components in place (battery). The only one I could find was a gold coloured one so once the swap has been done it will be different as it won't have the white front. Thought about replacing the battery whilst I had it open but that was £70 and the current battery seems to be OK.

I do have the latest 'cheap' iPad which is OK but I do like the laminated screen of the Air 2 - has a much better feel when using it. I have also had and iPad 1 which was given to my Mum and she has given it to a friend. Also an iPad 3 (also given to my Mum!) which is still in constant use and my wife has an original iPad Mini. Apart from the bendy Air 2 they are all still in daily use.

I will add some photos of the transfer and hopefully the operating repaired Air 2! :)
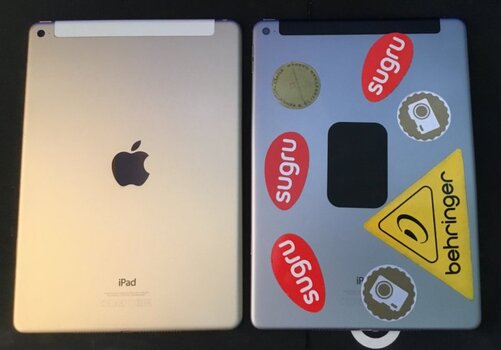
IMG 0440 IMG 0441 IMG 0442 IMG 0443
 
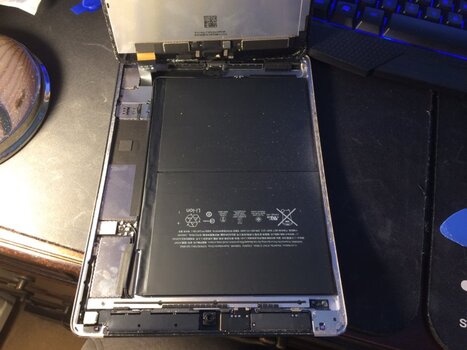
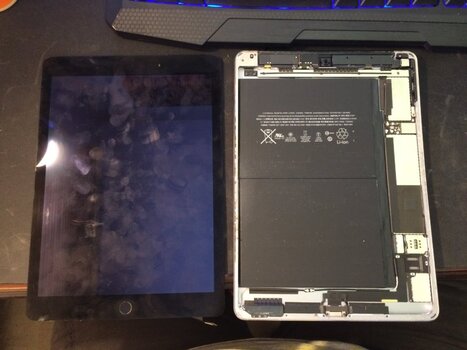
Started on the repair today. First part is getting the screen off which you do by heating the edges with a heat gun. As one of the edges was almost all exposed it was an easy job getting the rest of it done. After that you remove a cover plate that has 3 of the smallest screws you can imagine and then unplug the screen.

At this point I started to remove speakers and charging port etc. Had a look at the back and there was no visible damage to it or the other internals. So rather than continue I tried bending back to flat. After about five minutes it was good enough. Rather than continue I put everything back. Screen still worked but touch didn't which meant that on of the three connectors wasn't in place. After playing around it was working again and flat!! Just waiting on an adhesive kit to stick the screen back permanently and it is done.

Quite pleased with the effort.

IMG 3757 IMG 3758
 
A quick update:

The iPad is still working fine and has had no issues at all since straightening out the back.

Recently my iPhone 5S battery has been emptying rather fast. Initially I thought it was to do with the iOS11 upgrade but then I remembered my last iPhone 5S did they same and was replaced under warranty with a new one. Getting a battery replacement done costs about £50 locally and I think Apple is also around that sort of price. So I got a replacement battery for £11 and have replaced it myself. I can understand why some phones have replaceable batteries but given how delicate the insides of these things are now I can also understand why they don't! Some of the connectors are so small.

Hardest part of the replacement was getting the old battery out. Having the correct screwdrivers for the screws helps and that was the easy part. Despite my age I still don't need glasses but these screws are soooo small... The theory is that you pull a tab once the battery has been disconnected and that pulls out the adhesive pad that holds the battery in place. Of course when you do that it doesn't quite come out and the battery is still stuck. Levering the battery out was fun :popcorn: especially as Li-ion batteries have a tendency to explode if the get bent. But I'm still here and it didn't so that was good.
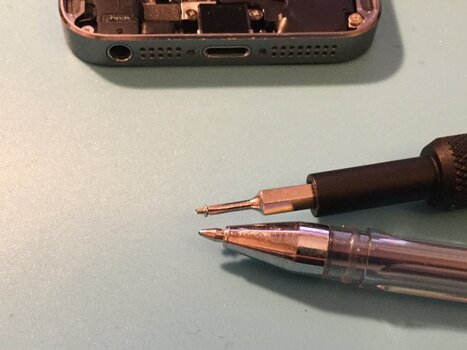
New battery went in fine and the hardest part is getting the screen and start button connectors back in place. So despite the should only take 6 minutes but really takes 70 minutes it is all back together and working. Hopefully should work for a while longer!

Though I would like a new phone I just don't like or need a large one as I have an iPad (or two). I would like a small phone with a decent camera so I may wait until the next iPhone SE appears.

Trouble is now my Mum wants her phone's battery replaced!
 
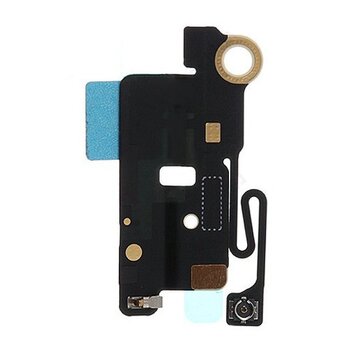
iPhone is actually still working. Well almost. Wifi isn't working - managed to break the very fine antenna when replacing the battery. Part ordered £5 so not too bad! Only trouble is that to replace it I think you need to nearly take every other part out so will be getting plenty of practice. :)
 
i think this would work nice and also looking perfect on your ipad :D View attachment 4267

Lol.

Had to take the phone apart to check and the antenna cable and this the part to be replaced.

568DF82E DAC2 47E7 94F1 3A7DE38B8284

All I have to do is this:

To view this content we will need your consent to set third party cookies.
For more detailed information, see our cookies page.
 
Bluetooth/wifi antenna replaced in iPhone. Love that the estimates says 45 minutes. 2hours later it was done. Main issue was getting two screws back in - they were absolute bastards. Amazing thing is that everything works.
 
Maybe a bit too late for this but when working with tiny screws like that tape a small magnet to the shaft of the screw driver and it will hold the screw on the driver (if screws are ferrous) if not ferrous (like stainless) dip the tip of the driver in grease or vaseline and that will work too ;)
 
  • Like
Reactions: glenwilson
Maybe a bit too late for this but when working with tiny screws like that tape a small magnet to the shaft of the screw driver and it will hold the screw on the driver (if screws are ferrous) if not ferrous (like stainless) dip the tip of the driver in grease or vaseline and that will work too ;)

The driver tips I was using are magnetic and most of the screws were too but there were 4 of the same type and two were magnetic and two were not!

Thanks, the magnet/grease tip though is so simple but will be so useful. Can’t believe I have never heard of those before. I know there used to be degausers that could be used to magnetise/demagnetise screwdrivers but haven’t seen one for ages.
 

Users who are viewing this thread