Todays View

Welcome to our Community
Wanting to join the rest of our members? Feel free to sign up today.
Sign up
That is so true. So often it is the one tool, often a simple one, that you need that stops a project, repair, or build in its tracks. Also knowing where they are makes a huge difference. This year has been one of organising tools for me.

Picture below is from yesterday. This morning can hardley see over the hedge it is raining that much.
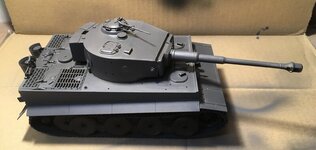
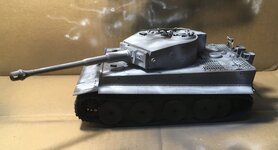
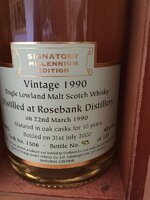

924B3696 34D6 4258 8320 886ED33FBFD1
 
yup, i also dream from my own full equiped cellar,
no phone, disturbing e.g.

just my tools n stuff.... and dont forget a fridge with beer ;-]
 

Attachments

  • IMG_0646.jpg
    IMG_0646.jpg
    77.1 KB · Views: 8
  • Like
Reactions: glenwilson
Tank commander, shadow coat, white highlights, shovelling 🙂
 

Attachments

  • 767EF63C-AF1E-4EAC-9D28-7D1D678985BA.jpeg
    767EF63C-AF1E-4EAC-9D28-7D1D678985BA.jpeg
    79.1 KB · Views: 6
  • 443F1F16-F645-4470-99D5-BA5DD2DF72A4.jpeg
    443F1F16-F645-4470-99D5-BA5DD2DF72A4.jpeg
    46.6 KB · Views: 6
  • 2E44FEC7-1444-4A31-AF2D-01F2A3C87B5E.jpeg
    2E44FEC7-1444-4A31-AF2D-01F2A3C87B5E.jpeg
    46.9 KB · Views: 6
  • 9D2EA4DF-8A0F-4F21-BADC-017047777BFE.jpeg
    9D2EA4DF-8A0F-4F21-BADC-017047777BFE.jpeg
    52.1 KB · Views: 6
Whilst sorting out a cupboard found this bottle of whisky ðŸĨƒ Is quite rare. Cost about ÂĢ50 new but is going up in price. Last auction for a bottle from the same cask was about ÂĢ370. Tank is coming along. Getting used to the airbrush now.
 

Attachments

  • C693436D-8C07-4AC4-83DA-7067FC1EE1D4.jpeg
    C693436D-8C07-4AC4-83DA-7067FC1EE1D4.jpeg
    59.9 KB · Views: 7
  • 199A8617-0CCF-425F-9783-7EBC396B714D.jpeg
    199A8617-0CCF-425F-9783-7EBC396B714D.jpeg
    79.5 KB · Views: 6
  • CC40A89D-990E-4515-8F86-A10614457154.jpeg
    CC40A89D-990E-4515-8F86-A10614457154.jpeg
    55.4 KB · Views: 6
Thanks. YouTube has been a great help. Really pleased with the result so far. A lot of weathering was using pastel sticks as dust on the tracks and around the exhaust - about ÂĢ2.50 for a box. The worst bits are the tracks as you have to glue the 100+ bits together and then before they set too much bend them into shape - one is a bit square at the front as in the pic below. Airbrushing isn’t too bad - just need to practice (funny as I will be passing the model shop tomorrow. ðŸĪ”ðŸĪŦ
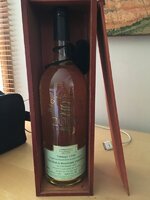
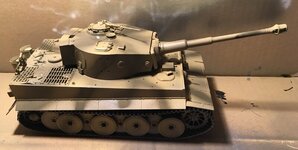
) Really enjoyed the build too.

97E5E3FB 9C92 42F2 B4EF A6B94AAEC264
 
Great job Glen, the detail is perfect down to that little bit of rust...beautiful (y)
 
Thank you. The weathering is the hard part and knowing when to stop. In this case I stopped before I screw it up completely 😀

Just need to tone down the numbers a bit (should have put them on earlier).
 
Well todays was mainly looking at a vacuum and cleaning stuff - Friday is mainly housework (we do clean on other days too). After that I needed a distraction as I have so many bits hurting at the moment and was rattling with the number of tablets thought I would look at the Corgi Aston Martin. Drilled out the rivet and took it apart. Most of the parts seem fine with nothing broken. Thee was a lot of crud inside which is expected for something about 55 years old. The only things need replacing are the tyres as they literally just crumbled away. Replacements are ÂĢ1.25 for the 4 so they have been ordered. The paint work is quite shabby on the body so I will strip that back, prime it and do it in a metallic gold (same Alclad paint as theh Dakota) which needs a black base coat. As I was going to strip back the body I also sanded of an ugly mould seam aon the wings. The window piece is dirty and a little bit scuffed but should polish up just fine.

Boxed, pristine versions are worth a lot but as it wasn’t in a decent condition like that I would rather repaint and have something that Iz can display as it was her toy.

7883879E E565 4DCC BBEA 1059CC614805
 
Done some cleaning today.
 

Attachments

  • F901366E-2270-4937-BA8F-CF1A56921866.jpeg
    F901366E-2270-4937-BA8F-CF1A56921866.jpeg
    47 KB · Views: 4
  • 861D7A7E-D5A0-49CA-934C-19BDE666CF14.jpeg
    861D7A7E-D5A0-49CA-934C-19BDE666CF14.jpeg
    50.6 KB · Views: 5
  • 534C0730-616A-4E6A-8A51-CAF8D9760813.jpeg
    534C0730-616A-4E6A-8A51-CAF8D9760813.jpeg
    79.4 KB · Views: 5
A little tip:
The plastic screen shows years of scratches, to get rid of those ( not so much the scratches but the dirt embeded in them ) use some 3000 grit wet and dry and rub it down while keeping the plastic submerged in a sink with water and washing up liquid ( washing up liquid reduces friction ) VERY GENTLY rub away until all dirt gone. End result screen will look sort of milky but thats fine. While fine rubbing keep taking it out of the water and drying with paper towel to check on progress ( you cant see it while its wet ). When you finish you'll look at it and think " that looks shit and worse than when I started " :D but its not over yet, now give it a couple of coats of UV clear cote ( stops the yellowing in time ) when done you should have a crystal clear screen better than new. But only if you want to spend the time (y)
 
Last edited:
  • Love
Reactions: glenwilson
I have been using Autosol (that is the correct spelling😀 and not that other product with a similar name) and cotton buds. The screen is in quite good condition so was in need of a clean more than anything but have been polishing it. Really need to get some 3000 grit. I have a roll of 1k and some 2k but not 3k - seems hard to find at a reasonable price. You can get it in sanding sticks but they are about ÂĢ8 for 5. I got some stirring sticks from Hobbycraft for 50p and coated them with contact adhesive, then did the same for 600, 1k and 2k sanding paper and made my own. They work really well and are a lot cheaper than buying sanding sticks even if you include the glue and paper.

The screen does have a crack in it but it isn’t too obvious so I will leave that. I could get a replacement but it is only going to be in a display cabinet. Many places suggest using pledge tile and floor polish as a coating but the particular type isn’t available anywhere.

Anyway, going to try the TENS device to see if it helps the hip pain I am getting. Hopefully the diagram below means the 2R and 2B electrodes are on the outside of the thigh rather than the inside. Otherwise it could be âšĄâš―âšĄâš―âšĄâš―âšĄðŸ˜ģ


47EA8E41 968F 49B8 B9A8 32595E816A39
 

Users who are viewing this thread