60-Minute IPA
Hops are included in many beers for a few different reasons. Firstly, they add bitterness to the beer (usually ale styles but not exclusive), secondly, they add to the aroma of the beer and finally they act as a preservative for the beer. First recorded use of hops was in Germany.
Pale ales were generally lowish in alcohol content so when the British Empire was a thing transporting beer to India quite often meant that the beer would spoil on the journey due to conditions and the heat during the journey. As hops had become known for acting as a preservative they were added to pale ales for export to India and these became known as IPA (Indian Pale Ale). These are relatively light coloured ale (amber to a slight caramel colour). After the Empire declined and the need for exporting beers declined with it the production of IPAs. There were still beers around that were IPAs but were not as popular as they have become.
With the popularity of craft brewing in the US increasing, IPA (sometimes also known as an Imperial Pale Ale) production was a popular brew. The IPA has now become popular across the USA and in the UK especially with drinkers who love hoppy beers. When you add the hops during the 60 minute boil part of the process will influence how the hop affects the beer. Adding hops at the start of the boil will add to the bitterness of the beer, at this stage most of the hop aromatics will boil away. Adding hops towards the end of the boil process will add something to the bitterness but mainly will add to the aroma of the beer and little to the bitterness. Adding hops in the middle does a bit of both - sort of. These beers can also be known as American IPA.
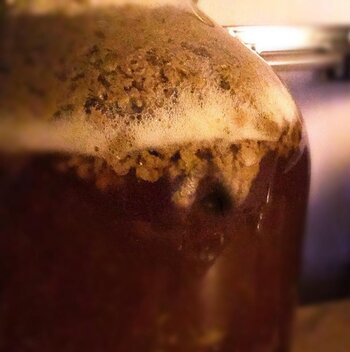
So what is a 60-minute IPA? Well, throughout the boils process you add hops as normal but the difference is that you add hops EVERY 5 minutes! A normal IPA will have something like 18gms of hops added (for a 4.5l batch). The 60-minute IPA (in my recipe) has a total of 40gms of hops! The end result is a beer that is quite bitter and a beer that also has a complex aroma. Dogfish Head brewery do a great 60-Minute IPA (and a 90-Minute which I really love!) and in the UK you can get it in Asda. The Asda beer isn't anywhere near as good as the beer available in the US but it gives you an idea of what it tastes like.
I used three hop types:
Columbus hops - dual purpose hop with intense earthy and faint citrus character. Used in American ales
Cascade hops - commonly used for both its aromatic qualities as well as its bittering
Golding hops - commonly used as an aroma (mellow and sweet scented) agent in beer
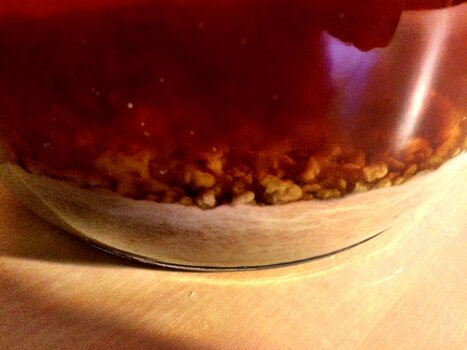
Golding was added at the beginning and end and the columbus and cascade throughout.
The other difference with this batch is the use of carrageenan during the last 10 minutes of the boil. Carrageenan is a seaweed that when added to the boil helps to draw out particulates and proteins that make the finished beer cloudy. Production beers are usually filtered but using this natural product should help clear the beer. Not that cloudy beer is bad it should help it to look better. One of the other batches I have done used a finings solution which appears to have the same effect but does mean that you lose some volume during the process whereas using carrageenan it will settle along with the yeast during the fermentation stage.
The only trouble with this brew is that really needs a 6 week conditioning in the bottle. So allowing for a 2 week fermentation it will be June before it is ready!
Anyone thinking of brewing should have a look at Home Brewing: A Complete Guide on How to Brew Beer by James Houston. 99p on Kindle or about £12 in paperback. Good value at 99p as it goes through all the processes and possible problems and equipment needed. Also discusses yeasts, hops and malts and the various beer types. Worth having a look at some other books to like Home Brew Beer by Greg Hughes which has better illustrations - wife bought me that one.
Have to admit I would love to do a big batch (5 gallon) rather than 1 gallon/4.5l but space required for that amount of beer is more than I have!
Hops are included in many beers for a few different reasons. Firstly, they add bitterness to the beer (usually ale styles but not exclusive), secondly, they add to the aroma of the beer and finally they act as a preservative for the beer. First recorded use of hops was in Germany.
Pale ales were generally lowish in alcohol content so when the British Empire was a thing transporting beer to India quite often meant that the beer would spoil on the journey due to conditions and the heat during the journey. As hops had become known for acting as a preservative they were added to pale ales for export to India and these became known as IPA (Indian Pale Ale). These are relatively light coloured ale (amber to a slight caramel colour). After the Empire declined and the need for exporting beers declined with it the production of IPAs. There were still beers around that were IPAs but were not as popular as they have become.
With the popularity of craft brewing in the US increasing, IPA (sometimes also known as an Imperial Pale Ale) production was a popular brew. The IPA has now become popular across the USA and in the UK especially with drinkers who love hoppy beers. When you add the hops during the 60 minute boil part of the process will influence how the hop affects the beer. Adding hops at the start of the boil will add to the bitterness of the beer, at this stage most of the hop aromatics will boil away. Adding hops towards the end of the boil process will add something to the bitterness but mainly will add to the aroma of the beer and little to the bitterness. Adding hops in the middle does a bit of both - sort of. These beers can also be known as American IPA.
So what is a 60-minute IPA? Well, throughout the boils process you add hops as normal but the difference is that you add hops EVERY 5 minutes! A normal IPA will have something like 18gms of hops added (for a 4.5l batch). The 60-minute IPA (in my recipe) has a total of 40gms of hops! The end result is a beer that is quite bitter
and a beer that also has a complex aroma. Dogfish Head brewery do a great 60-Minute IPA (and a 90-Minute which I really love!) and in the UK you can get it in Asda. The Asda beer isn't anywhere near as good as the beer available in the US but it gives you an idea of what it tastes like.I used three hop types:
Columbus hops - dual purpose hop with intense earthy and faint citrus character. Used in American ales
Cascade hops - commonly used for both its aromatic qualities as well as its bittering
Golding hops - commonly used as an aroma (mellow and sweet scented) agent in beer
Golding was added at the beginning and end and the columbus and cascade throughout.
The other difference with this batch is the use of carrageenan during the last 10 minutes of the boil. Carrageenan is a seaweed that when added to the boil helps to draw out particulates and proteins that make the finished beer cloudy. Production beers are usually filtered but using this natural product should help clear the beer. Not that cloudy beer is bad it should help it to look better. One of the other batches I have done used a finings solution which appears to have the same effect but does mean that you lose some volume during the process whereas using carrageenan it will settle along with the yeast during the fermentation stage.
The only trouble with this brew is that really needs a 6 week conditioning in the bottle. So allowing for a 2 week fermentation it will be June before it is ready!
Anyone thinking of brewing should have a look at Home Brewing: A Complete Guide on How to Brew Beer by James Houston. 99p on Kindle or about £12 in paperback. Good value at 99p as it goes through all the processes and possible problems and equipment needed. Also discusses yeasts, hops and malts and the various beer types. Worth having a look at some other books to like Home Brew Beer by Greg Hughes which has better illustrations - wife bought me that one.
Have to admit I would love to do a big batch (5 gallon) rather than 1 gallon/4.5l but space required for that amount of beer is more than I have!
Last edited: